Good product photography can make a handmade product look more valuable before a customer ever reads the description.
That matters for laser-cut signs, CNC carvings, UV printed items, 3D printed products, tumblers, boards, gifts, ornaments, plaques, and almost anything else you sell online or at local markets.
The product itself still has to be good. But if the photo looks dark, cluttered, crooked, or confusing, people may scroll past before they ever understand what you made.
The good news is that you do not need a professional studio to take better product photos. You need a repeatable setup, decent light, clean backgrounds, and a basic shot list you can use every time.
Why Product Photos Matter for Maker Businesses
When someone shops online, your photo is doing a lot of the selling before your copy gets a chance.
A strong product photo helps answer simple questions quickly:
- What is this?
- How big is it?
- What material is it made from?
- What does the engraving, print, cut, or texture look like up close?
- How would this look in someone’s home, office, shop, kitchen, event, or gift box?
For maker products, that last part is especially important. Customers are not just buying wood, acrylic, metal, plastic, resin, glass, or printed material. They are buying the finished result and the feeling that goes with it.
A clean product photo makes your work feel more intentional, more premium, and easier to trust.
Start With a Repeatable Photo Area
The easiest way to improve product photography is to stop starting from scratch every time.
You do not need a dedicated room. You just need a small area where you can set up the same basic layout over and over.
That could be:
- A folding table near a window
- A small photo light box
- A desktop with a backdrop clipped behind it
- A workbench with a clean surface
- A corner of a room with consistent lighting
- A staged wall or shelf area for finished products
The goal is not perfection. The goal is consistency.
If every product photo has a completely different background, lighting style, angle, and color tone, your shop can start to feel scattered. A repeatable setup helps your products look like they belong to the same brand.
Use Simple Backgrounds First
One of the biggest beginner mistakes is using backgrounds that compete with the product.
Busy wood grain, cluttered shop benches, random tools, harsh shadows, packaging scraps, and messy rooms can pull attention away from the item you are trying to sell.
For most product listings, start with clean backgrounds like:
- White poster board
- Light gray paper
- Neutral fabric
- Matte black background for light products
- Wood tabletop for rustic products
- Plain wall for signs and wall art
- Simple staged shelf or countertop
A clean background lets the product be the main subject. Once you have the basic listing photos covered, then you can add lifestyle images, props, staged scenes, or seasonal backgrounds.
Lighting Is More Important Than the Camera
You can take strong product photos with a phone if the lighting is good.
You can also take bad product photos with an expensive camera if the lighting is harsh, uneven, or too dark.
For most small maker businesses, soft even light is the best place to start.
Good options include:
- Natural window light
- A light box for small products
- Two softbox lights
- LED panel lights with diffusion
- A white foam board used as a reflector
Avoid direct overhead light when possible. It can create harsh shadows, glare, and strange color casts. This is especially noticeable on glossy UV prints, acrylic, glass, metal, tumblers, and sealed wood products.
If the product has a shiny surface, move the lights around until the reflection looks controlled instead of distracting.
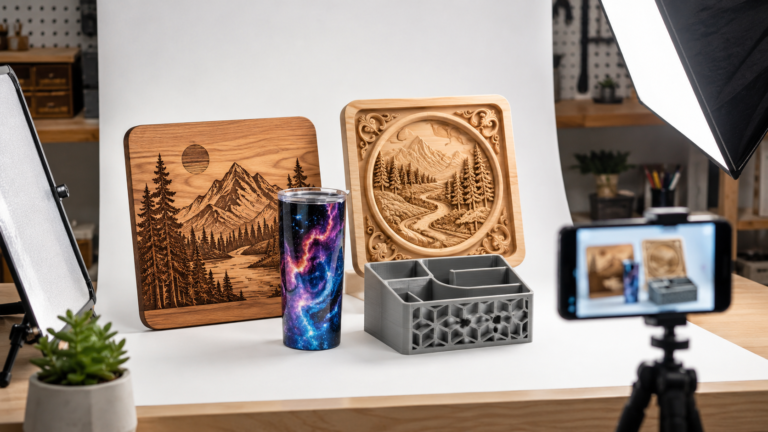
A Basic Product Photography Setup
A simple setup can work for a wide range of laser, CNC, UV, and 3D printed products.
Start with this:
- A small table or work surface
- A clean backdrop
- One or two soft light sources
- A tripod or phone stand
- A white foam board or reflector
- A microfiber cloth for dust and fingerprints
- A ruler, prop, hand, or common object for scale when needed
Set the product several inches away from the background if possible. This helps reduce harsh backdrop shadows and gives the image more depth.
Keep your camera or phone steady. A tripod is one of the cheapest upgrades you can make because it keeps your angles consistent and helps prevent blurry images.
Create a Standard Shot List
Instead of guessing which photos to take for every product, create a simple shot list and reuse it.
For most products, try to capture:
- Main front-facing product photo
- Angle shot from the side
- Close-up of engraving, texture, print, cut quality, or finish
- Scale photo showing size
- Lifestyle or staged photo
- Packaging or gift-ready photo if relevant
- Customization example if the product can be personalized
This gives customers more confidence because they can see the product from multiple angles before buying.
For custom products, it also helps show the quality of your work without needing to explain every detail in the description.
Photo Tips for Laser Engraved Products
Laser engraved products often need close-up photos because the value is in the detail.
For laser work, make sure your photos show:
- The engraving depth or contrast
- The material texture
- The edge quality if the item is cut
- The finish or stain color
- Any personalization area
- The full product shape and size
Wood products can look very different depending on the light direction. Side lighting can help show engraved depth, but too much side lighting can create heavy shadows. Try a few angles and pick the one that makes the engraving easy to read without making the photo look too dramatic.
For clear acrylic, frosted acrylic, glass, and mirrored surfaces, be careful with reflections. A darker background or angled lighting may help the engraving stand out.
Photo Tips for CNC Products
CNC products often need photos that show shape, depth, carved detail, and finish quality.
This is especially true for carved signs, trays, plaques, wall art, relief carvings, inlays, cutting boards, and decorative panels.
For CNC products, capture:
- A straight-on main photo
- An angled photo that shows depth
- A close-up of toolpath detail
- A finish photo showing stain, oil, paint, or clear coat
- A scale photo if the product size is not obvious
- A wall, shelf, or tabletop photo showing how it might be used
CNC work can look flat in photos if the lighting is too even. A slight angle of light can help show carving depth and texture without making the product look rough.
Make sure the product is clean before shooting. Dust in carved areas can show up more than expected, especially on darker finishes.
Photo Tips for UV Printed Products
UV printed products can be tricky because the print may be glossy, textured, raised, or reflective.
For UV products, pay close attention to glare. The photo should show the print clearly without a bright reflection covering the design.
For UV printed items, capture:
- The full printed product
- A close-up of print quality
- An angled shot showing texture or raised ink if relevant
- A photo showing the product in use
- A clean detail shot of edges, corners, or curved surfaces
- A packaging or gift photo if sold as a finished item
This matters for tumblers, phone cases, acrylic blanks, signs, tags, ornaments, promotional items, coasters, packaging, and personalized gifts.
If the product has a glossy surface, try moving the light farther away, diffusing the light, or turning the product slightly until the reflection moves away from the important design area.
Photo Tips for 3D Printed Products
3D printed products need photos that make the item look useful, clean, and finished.
Layer lines, supports, seams, and print texture can either help or hurt the image depending on what you are selling.
For 3D printed products, capture:
- The full product from the front
- An angled view showing shape and depth
- A close-up of surface quality
- A photo showing how the item is used
- A scale photo for size reference
- Color or variation photos if available
If the product is functional, show it doing its job. A wall mount should be shown on a wall. A desk organizer should be shown on a desk. A tool holder should be shown with tools. Customers should not have to imagine the use case from scratch.
For decorative 3D prints, staging matters more. A clean shelf, desk, game room, nursery, office, or hobby-space photo can make the product feel more giftable.
Show Scale Clearly
One of the easiest ways to reduce customer confusion is to show scale.
Dimensions in the description are important, but many shoppers do not visualize measurements well. A scale photo helps them understand the product faster.
You can show scale with:
- A hand holding the product
- A ruler or tape measure
- A common object nearby
- The item staged on a wall, desk, shelf, counter, or table
- Multiple sizes photographed together
This is especially important for ornaments, signs, plaques, wall art, trays, tags, miniatures, 3D printed accessories, and personalized gifts.
Use Lifestyle Photos to Help People Imagine the Product
Clean catalog-style photos are useful, but lifestyle photos help customers imagine owning the product.
A lifestyle photo shows the item in context.
For example:
- A laser engraved cutting board staged in a kitchen
- A CNC carved sign hanging on a wall
- A UV printed tumbler on a desk or picnic table
- A 3D printed organizer holding real items
- A custom ornament on a tree
- A gift set arranged with packaging
These photos do not need to be complicated. A simple, believable scene is usually better than a heavily staged photo that feels fake or overcrowded.
The product should still be the hero.
Do Not Overdo the Props
Props can help, but they can also confuse the customer.
If someone cannot tell what is included in the purchase, the photo may create problems later.
Use props carefully. They should support the product, not become part of the offer unless they are actually included.
For example, if you are selling a charcuterie board, it is fine to stage it with cheese, crackers, or small bowls. But the listing should make it clear whether those items are for staging only.
The same applies to cups, flowers, tools, shelves, frames, candles, electronics, food, and packaging accessories.
Clean the Product Before Taking Photos
The camera will catch things you may not notice in the shop.
Before taking photos, check for:
- Dust
- Fingerprints
- Loose fibers
- Burn residue
- Glue marks
- Sanding dust
- Smudges
- Packaging lint
This matters a lot with glossy UV products, acrylic, glass, tumblers, black surfaces, dark stained wood, and 3D prints with visible texture.
A quick wipe with a microfiber cloth can make a big difference.
Keep Your Editing Simple
Photo editing should make the product easier to see. It should not misrepresent what the customer will receive.
Basic edits are usually enough:
- Straighten the image
- Crop distractions
- Adjust brightness
- Correct color if needed
- Sharpen lightly
- Remove small dust spots if they are not part of the product
Be careful with filters. Heavy filters can change the color of wood, stain, acrylic, ink, filament, powder coat, or metal. That can lead to disappointed customers if the product looks different in person.
Build a Simple Photo Workflow
The best product photography setup is the one you will actually use.
A simple repeatable workflow might look like this:
- Clean the product.
- Set up the background.
- Turn on or position the lights.
- Place the product.
- Take the main photo.
- Take angle and detail photos.
- Take a scale photo.
- Take one staged lifestyle photo.
- Edit lightly.
- Save the images with clear file names.
This keeps the process from becoming overwhelming, especially when you have multiple products to list.
Suggested Photo Set for Each Product Listing
For most maker-business listings, a strong photo set could include:
- Photo 1: Clean main product photo
- Photo 2: Angled product photo
- Photo 3: Close-up detail photo
- Photo 4: Scale photo
- Photo 5: Lifestyle or staged photo
- Photo 6: Personalization example
- Photo 7: Packaging or gift-ready photo
You may not need all of these for every item, but having a standard list helps you avoid missing important shots.
Final Thoughts
Better product photography does not have to mean expensive cameras, complicated lighting, or a full studio.
For laser, CNC, UV, and 3D printed products, the biggest improvements usually come from simple things: cleaner backgrounds, softer light, consistent angles, better detail shots, and photos that show how the product is actually used.
Your products already took time, tools, materials, software, testing, and skill to make. Your photos should help customers see that value quickly.
Start with a basic setup. Make it repeatable. Build a shot list. Then improve one part at a time.
That is how product photography becomes less of a chore and more of a selling tool for your maker business.