Custom Order Workflow for Small Maker Businesses
A custom order workflow does not need to be complicated, but it does need to be repeatable. When every order starts in a different place and lives in scattered messages, files, and mental notes, even a small shop can feel disorganized fast.
Custom orders can be some of the best work in a maker business.
They can also become the fastest way to make your shop feel chaotic.
That usually does not happen because the order itself is unusually difficult. It happens because the process around the order is loose. A customer sends a message on one platform, reference photos on another, size details in a follow-up text, and approval notes in email. You make a quote from memory, promise a date before checking capacity, save the file under whatever name seems convenient at the time, and tell yourself you will remember the details later.
That can work when there are only one or two open jobs. It stops working once custom orders become a real part of the business.
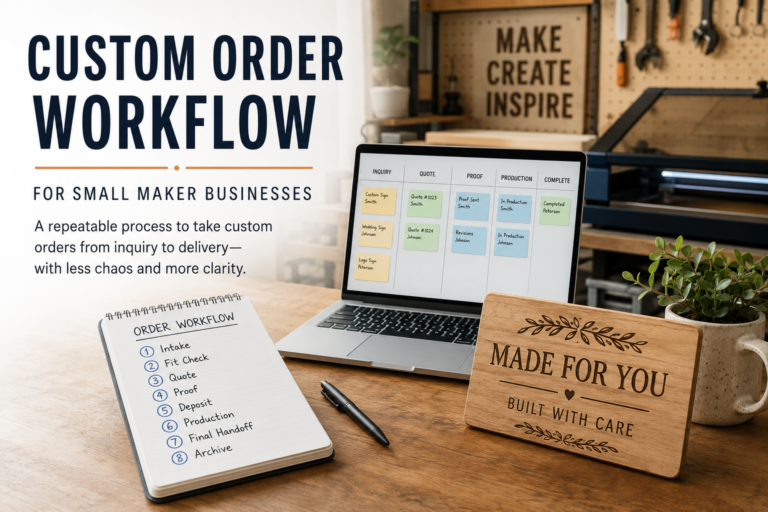
A repeatable workflow is what turns custom work from a constant scramble into something you can actually manage. It does not need to be enterprise software or a complicated automation stack. In most small shops, it is more about deciding on a clear sequence and using that sequence every time: intake, fit check, quote, proof, deposit, production, final handoff, and archive.
If you are still building the basic business side around your shop, the Startup Checklist, Business Tools, Business Bank Comparison, and Wave Accounting Review are useful companion resources. If custom orders are exposing pricing gaps, the Product Pricing Calculator and How Much Can You Make With a Laser Engraving Business? can help frame labor, margin, and earning potential more realistically.
Why Custom Orders Feel Messy So Quickly
Most small shops do not struggle because they lack effort. They struggle because they are running custom work through an informal system.
Informal systems feel fine when only a few projects are open. The problems show up when several jobs overlap. One customer is waiting on a proof, one needs an invoice resent, one changed the spelling after approval, one has not paid the deposit, and one wants pickup on a date you already half-promised to somebody else.
Without a consistent order workflow, predictable issues keep repeating:
- Details get trapped in DMs instead of one order record.
- Quotes change from job to job because each one is estimated differently.
- Proofs turn into open-ended revision loops.
- Deposits are forgotten or collected too late.
- Production starts before approvals are actually clear.
- Delivery dates are promised before the schedule is checked.
- Finished files are hard to find when reorder requests come in later.
The goal is not perfection. The goal is reducing avoidable friction.
A good workflow gives you a standard way to answer the same questions every time: What did the customer ask for? What stage is the order in? What needs to happen next? Where are the files, approvals, and payment records tied to this job?
If you can answer those quickly, custom work becomes much easier to manage.
Step 1: Start With One Official Intake Path
Customers will still message you through Instagram, Etsy, email, your website, text, market follow-up, or whatever platform they already use. You cannot fully control where the first conversation begins.
What you can control is where the order officially starts.
That might be a website form, a Google Form, an intake template in email, a CRM record, or a standard message you send that says, in effect, “Great, please send the order details here so I can quote it correctly.” The exact tool matters less than consistency.
Your intake should collect the practical basics every time:
- Customer name and best contact method.
- Product type or project type.
- Quantity.
- Dimensions or size range.
- Material preferences, if relevant.
- Personalization details such as names, dates, wording, colors, or logos.
- Reference images or examples.
- Deadline or event date, if there is one.
- Shipping or pickup expectation.
- Any usage constraints that matter, such as outdoor use, food contact, wall mounting, or repeat reorders.
This is one of the easiest places to save future time. A weak intake creates a weak order. If the first request is vague and you move forward anyway, you usually pay for that later in extra messages, unclear approvals, and rushed decisions.
Ask for the Details Before You Start Designing
A lot of makers lose time by treating incomplete requests like real jobs.
If the customer has not provided dimensions, wording, quantity, artwork, timing, or material expectations, the order is not ready for a quote or proof yet. That does not mean being rude or rigid. It means moving the conversation into a usable format before you spend design labor on it.
A simple response can protect the workflow:
“Absolutely, I can look at that. To quote it correctly, I need the size, quantity, wording, deadline, and any reference photos. Once I have those, I can confirm whether it is a good fit and send the next steps.”
That keeps the tone helpful while making the process clear.
Step 2: Do a Fit Check Before You Quote
Not every custom order is a good fit.
That sounds obvious, but many small shops skip this pause because they do not want to lose the sale. Then they end up accepting jobs that do not fit the machine, timeline, finishing workload, pricing model, material reality, or product style they actually want to support.
A fit check is your internal decision point before you start giving specifics.
Ask yourself:
- Is this the kind of product we already make, or is it really a new product-development project?
- Do we have the right materials, machine capacity, and finishing workflow for it?
- Is the requested timeline realistic?
- Is the quantity reasonable for the expected margin?
- Does the request introduce risks around artwork quality, licensing, food contact, fragile materials, outdoor durability, or unsupported performance claims?
- Will this order block better-fit work during the same week?
This step matters because custom work often feels profitable before it is operationally clean. A one-off idea can sound exciting and still be a bad use of shop time.
If the answer is no, it is better to say no early than to say yes and resent the job for the next two weeks.
You can still keep the response professional:
“Thanks for thinking of us. That project is outside what we can confidently produce right now, so I do not want to take it on and risk a poor result.”
A good fit check is not about rejecting work casually. It is about protecting the shop from jobs that create more risk than revenue.
Step 3: Quote From a Standard Structure, Not From Memory
Once the order passes the fit check, quote it from a repeatable framework.
The biggest pricing problem in custom work is not always that people intentionally charge too little. Often they quote too quickly and leave out important parts of the work: design time, proof revisions, setup, material waste, packaging, machine prep, special sourcing, rush handling, and communication time.
That is why custom-order quoting needs a standard structure.
A simple quote usually includes:
- Product description.
- Quantity.
- Size or specification.
- Material or finish assumptions.
- What is included in the design/proof process.
- Number of revisions included before extra charges apply.
- Estimated production timeline after approval and deposit.
- Shipping or pickup terms.
- Total price or price range.
- Deposit requirement.
- Expiration date for the quote, if pricing or material availability may change.
The quote does not need to read like a legal document. It does need to make the order understandable. The customer should know what they are buying, what is included, what is not included, and what must happen before production starts.
If you need help tightening the labor side of your pricing, the Product Pricing Calculator is a useful backstop. And if you are trying to understand how pricing interacts with actual earning power in a small production shop, How Much Can You Make With a Laser Engraving Business? gives useful context.
Avoid Quoting Exact Delivery Dates Too Early
A common mistake is promising a finished date before the order is approved and paid.
A better phrasing is usually something like: production begins after proof approval and deposit, and the current turnaround is X business days from that point.
That keeps your schedule tied to real order progress instead of a loosely optimistic conversation date.
Step 4: Separate the Proof Stage From the Production Stage
This is where many custom shops quietly lose control.
If customers do not clearly understand what the proof stage is for, they often treat it like open-ended collaborative design time. That can drag one order across days or weeks in tiny revisions.
A proof should exist to confirm the agreed concept before production. It should show the layout, wording, placement, scale relationship, color direction if relevant, and anything that materially affects the final piece.
It should not become a free design studio unless you intentionally price it that way.
Tell the customer:
- When they will receive the proof.
- What the proof is meant to confirm.
- How many revisions are included.
- What kinds of changes are minor versus major.
- What happens if they request a new concept after proofing starts.
- That production does not begin until approval and deposit are complete.
This gives the order boundaries. Boundaries are what make repeatability possible.
Define Approval in Plain Language
Do not assume the customer knows what approval means.
A useful approval note might say:
“Please review spelling, names, dates, layout, and placement carefully. Once approved, this version moves into production. Changes requested after approval may affect the timeline or price.”
That one paragraph can prevent a lot of confusion later. It also gives you something concrete to point back to if a customer tries to change the wording after the piece is already made.
Step 5: Collect a Deposit Before You Commit Production Capacity
Deposits do two important things.
First, they reduce your financial exposure. Second, they help distinguish active orders from tentative interest.
Many small shops get stuck because they start real work on “probably yes” jobs. Then the customer disappears, delays the decision, or changes direction after labor has already been spent.
A deposit is the point where the order becomes real.
The exact percentage is a business decision, but the workflow principle is simple: do not reserve production capacity, order special materials, or begin making unless your process says the order is approved and paid according to your terms.
If you are cleaning up the money side of the business more broadly, Business Bank Comparison and Wave Accounting Review are good places to review payment handling and bookkeeping basics without overcomplicating the shop.
Keep Payment Records Attached to the Order
Even in a simple system, each order should have a visible payment status:
- Quote sent.
- Deposit unpaid.
- Deposit paid.
- Balance due.
- Paid in full.
- Refunded or adjusted, if relevant.
That sounds basic, but it prevents the “I thought they paid already” problem that shows up when payments are scattered across apps and memory.
Step 6: Use a File Naming System You Can Understand Six Months Later
File chaos is one of the most expensive invisible problems in a maker business.
A weak naming system does not usually hurt on day one. It hurts later when the customer wants a reorder, asks for a date update, needs the family name corrected, or wants the same project in a different size. If the file lives in a random desktop folder under a name like “final-final-new-version-3,” the reorder becomes harder than it should be.
Use a file naming convention that ties the order to the customer and stage.
A simple structure might look like this:
YYYY-MM-DD_customer-lastname_project_short-description_stageExamples:
2026-06-19_smith_sign_front-porch_proof-v1
2026-06-19_smith_sign_front-porch_approved
2026-06-19_smith_sign_front-porch_production
The exact format can vary, but it should do three things:
- Make files searchable by customer or date.
- Show the stage clearly.
- Keep approved and production files distinct from draft experiments.
Organize the Folder the Same Way Every Time
For example:
- Intake
- Quote
- Proofs
- Approved Files
- Production Files
- Photos
- Invoice or Payment Records
That level of organization is not overkill once custom orders start repeating. It is what allows you to stop depending on memory.
Cloud storage can help if you are working across devices or sharing with a helper, contractor, or future employee. But again, the tool matters less than the habit. A clean folder system in simple cloud storage is better than a powerful app nobody uses consistently.
Step 7: Track Approval Changes Like They Cost Real Time
Approval changes are one of the biggest workflow leaks in custom work.
The customer approves the proof, then sends a “small change.” Then another one. Then they want to go back to version one, but with the size from version two and the wording from version three.
This is why approval needs a clear handoff.
Once the proof is approved, note the approval date and approved version. If changes come after approval, treat them as post-approval changes, not as if the order is still casually in proofing.
That does not mean you can never accommodate them. It means your workflow should acknowledge that changes after approval can affect schedule, labor, and sometimes price.
A practical rule is to keep one visible note on every order:
Approved version: Proof v2 on 2026-06-14That single line can save a surprising amount of confusion when the conversation gets long.
Keep the Latest Version Obvious
Version control does not have to be complicated, but it does have to be obvious.
If you use proof-v1, proof-v2, and proof-v3, make sure only one file is marked approved. If a customer asks about an older version, you should be able to tell quickly whether it was only a draft or the version that actually went into production.
This matters even more for personalized orders. A misspelled name, wrong date, or outdated logo can turn a small file-management mistake into a remake.
Step 8: Schedule Production From Confirmed Orders, Not Hopeful Ones
Production scheduling should reflect what is actually ready to make.
That means the order has:
- Complete intake details.
- A confirmed quote.
- An approved proof, if needed.
- A paid deposit or payment status that meets your policy.
- A realistic due date based on current capacity.
If even one of those is missing, the job is not fully ready.
This is where many shops overpromise. They mentally count unapproved or unpaid projects as if they are locked in, then realize later that the confirmed workload is colliding with new requests.
A small production board, spreadsheet, or project tracker is often enough. The important thing is that your schedule shows order status, due date, and next action clearly.
You do not need a perfect system before you start. Even a simple board with columns for “Quote Sent,” “Proof Sent,” “Awaiting Deposit,” “Ready for Production,” “In Production,” and “Ready for Pickup” is a major improvement over tracking everything in your head.
Step 9: Treat Delivery Dates as Commitments, Not Guesses
Customers care a lot about dates, especially for gifts, events, weddings, graduations, vendor displays, and business signage.
That is why delivery language has to be careful.
A repeatable custom-order workflow should distinguish between:
- Requested date.
- Estimated completion date.
- Ship-by date or pickup-ready date.
- Actual handoff date.
Those are not the same thing.
If you collapse them into one casual promise, problems start fast. A customer may hear “should be ready by next Friday” as a firm guarantee, even if you meant it more loosely.
A better approach is to tie dates to workflow stages:
“Once the proof is approved and the deposit is received, your order will be scheduled for production. Current turnaround is about X business days from that point.”
That is usually more accurate and easier to manage than making date promises during the first conversation.
Add Buffer Around Real Deadlines
If an order is tied to a wedding, graduation, business opening, craft fair, or birthday, do not schedule it as if the last possible day is acceptable.
Build in room for proof delays, material problems, finishing time, shipping delays, or a small remake if something goes wrong. That does not mean padding every order dramatically. It means being honest about the difference between a normal target date and a hard event deadline.
Custom work feels much less stressful when your delivery dates are based on capacity instead of optimism.
Step 10: Make Handoff and Pickup Part of the System Too
A lot of makers think the workflow ends when production ends.
It does not. Handoff is part of the order.
If pickup instructions, shipping confirmation, packaging notes, care instructions, or balance collection are vague, the last part of the job becomes messy even if the product itself is done well.
Your handoff checklist might include:
- Final quality check.
- Product photo for records.
- Packaging complete.
- Care instructions included, if needed.
- Customer notified.
- Pickup location and time window confirmed, or tracking sent.
- Final balance paid, if applicable.
- Order marked complete.
Again, this is simple on purpose. Simple systems are easier to repeat.
A handoff checklist also protects the customer experience. The customer does not see your file folders, proof notes, production board, or payment records. They see whether the finished item is correct, whether pickup or shipping is clear, and whether the order feels handled professionally.
Step 11: Archive the Order So Reorders Are Easier Later
An order archive is not just about storage. It is about future leverage.
When a happy customer comes back three months later and wants the same item for another family member, a good archive turns that into an easy reorder instead of a reconstruction project.
Archive the final order record with:
- Customer details.
- Final approved wording or personalization.
- Dimensions and materials.
- Approved file.
- Production file.
- Notes on finish, hardware, packaging, or installation.
- Final price and payment status.
- Photo, if useful.
This is where your business starts becoming more efficient over time. Repeatability is not just about avoiding mistakes. It is about building reusable order history.
That order history can also show you which custom products are worth standardizing. If you keep making variations of the same sign, award, ornament, display, or branded item, you may eventually turn that custom process into a productized offer with clearer pricing and faster turnaround.
A Simple Custom Order Status Flow That Works for Many Small Shops
If your current process is mostly mental, start with a plain status sequence like this:
- New inquiry
- Intake requested
- Intake complete
- Fit check
- Quote sent
- Awaiting customer approval
- Proof in progress
- Proof sent
- Revision requested
- Awaiting deposit
- Approved and paid
- In production
- Quality check
- Ready for pickup or shipment
- Complete
- Archived
That is enough structure for a lot of small businesses without turning the workflow into a giant administrative project.
The status flow is useful because it separates real progress from conversation. A customer asking questions is not the same as an order being ready. A quote sent is not the same as a paid job. A proof viewed is not the same as an approved proof. A finished item is not the same as a completed handoff.
Once those stages are visible, it becomes much easier to see what is actually blocking the order.
Tools Matter Less Than Consistency, But Consistency Still Needs Tools
You do not need a huge software stack to run custom orders well.
But you probably do need some combination of forms, invoices, cloud storage, bookkeeping, and a place to track status. If you are still piecing together the operational side of the business, Business Tools is the broad starting point, and Wave Accounting Review is helpful if invoicing and payment tracking are still too manual.
The real point is this: pick tools that support your process instead of replacing the need for a process. A messy workflow inside better software is still a messy workflow.
For a small shop, a workable starter stack might be as simple as:
- One intake form.
- One quote or invoice tool.
- One folder structure for customer files.
- One payment tracking process.
- One production board or spreadsheet.
- One archive location.
That is not glamorous, but it is enough to create consistency. Once the habit is stable, you can improve the tools later.
FAQ: Custom Order Workflows for Small Maker Businesses
What Is a Custom Order Workflow?
A custom order workflow is the repeatable sequence you use to move a custom job from first inquiry to final delivery. For a maker business, that usually includes intake, fit check, quote, proof, deposit, file organization, production, handoff, and archive.
The point is not to make the business feel overly formal. The point is to stop every custom order from becoming a one-off scramble.
Do I Need Expensive Software to Manage Custom Orders?
No. Many small shops can start with a form, spreadsheet, invoice tool, cloud storage folder, and simple production board.
Software can help, but it will not fix an unclear process by itself. Start by defining the stages of the order. Then choose tools that make those stages easier to follow.
Should I Collect a Deposit Before Making a Custom Order?
In many custom-order businesses, collecting a deposit before production is a practical way to reduce risk and confirm that the order is real. The exact deposit amount is a business decision, and the terms should be clear before the customer approves the order.
The workflow principle is simple: avoid reserving production capacity, ordering special materials, or starting irreversible work before your payment and approval process is complete.
How Many Proof Revisions Should I Include?
There is no universal number, but the important thing is to define it before the proof stage begins.
Many shops include a small number of reasonable revisions and charge more for major concept changes, new artwork direction, or changes requested after approval. The exact policy can vary, but the customer should understand what is included before design work starts.
How Should I Name Custom Order Files?
Use a file name that makes the order searchable and shows the stage clearly. A simple format is:
YYYY-MM-DD_customer-name_project_stageFor example:
2026-06-19_smith_front-porch-sign_proof-v1
2026-06-19_smith_front-porch-sign_approved
2026-06-19_smith_front-porch-sign_production
The goal is to make it easy to find the right file later, especially for reorders or corrections.
When Should I Give the Customer a Delivery Date?
Avoid giving a firm delivery date before the order is defined, approved, and paid according to your process.
A safer approach is to give a turnaround window tied to the approval stage: production begins after proof approval and deposit, and the current turnaround is X business days from that point. That keeps the timeline connected to real order progress instead of early conversation.
What Is the Biggest Mistake Small Shops Make With Custom Orders?
One of the biggest mistakes is starting real work before the order is ready.
That can mean designing before the intake is complete, quoting before the fit check, producing before approval, or promising a date before the schedule is clear. A repeatable workflow prevents those stages from blending together.
Final Takeaway
A repeatable custom order workflow is not about making your shop feel corporate. It is about making custom work survivable and profitable.
The strongest small-shop systems are usually not complicated. They are just clear. One intake path. One quoting structure. One proof process. One deposit rule. One file naming system. One production status flow. One handoff checklist. One archive habit.
That kind of consistency protects your time, reduces customer confusion, and makes it much easier to scale from “I can probably make that” to “yes, here is exactly how custom orders work here.”
If your custom jobs currently feel harder to manage than they should, the fix is usually not more hustle. It is a better sequence.
And once the sequence is in place, custom work becomes easier to quote, easier to produce, easier to hand off, and much easier to repeat.