
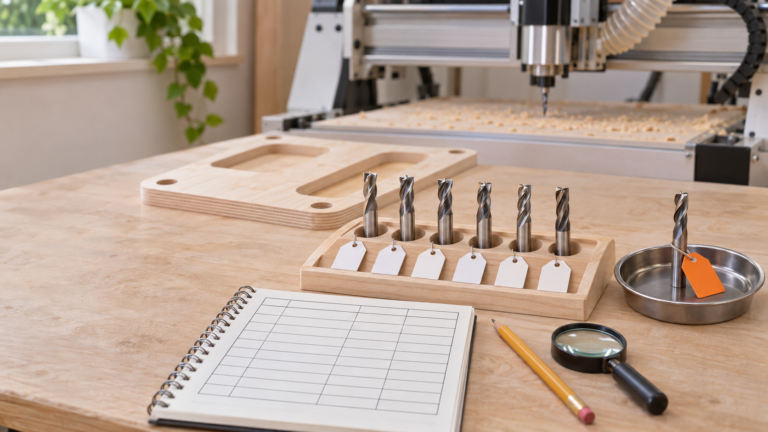
Two bits that look identical are sitting on the bench. One has cut a handful of clean jobs. The other has worked through abrasive sheet goods, survived an interrupted run, and made a cut that sounded wrong. Both came in the same order.
If all you’ve written down is the purchase date, those two tools have the same history. In the machine, they don’t.
A CNC bit life log follows one physical tool across multiple jobs. It ties that tool’s exact identity to the material and work it saw, the output and condition evidence you observed, any cleaning or inspection done under the right instructions, abnormal events, and its current status: active for a defined approved use, held, or retired. Sending a tool out for service happens while it stays on hold. It’s not permission to put it back to work.
The log isn’t a countdown clock, a substitute for inspection, or a guarantee against breakage. It’s a way to stop asking a calendar to answer a question about condition.
Why hours and job counts need context
Elapsed time, jobs completed, and cut distance can all be useful measures of exposure, as long as your shop records them consistently and includes units. None of them can tell you a tool’s condition on its own.
Tool geometry, substrate, coating, the material you’re cutting, contamination, cutting conditions, workholding, machine condition, runout, chip evacuation, heat, and abnormal events all change what that exposure means. “Ten jobs” could mean ten small lettering passes or ten full sheets. Even a measured cutting distance says little without the material and process behind it.
Manufacturer data backs this up. PreciseBits publishes a tool-life example for one of its own UltraBIT steel-rule-die kerf cutters, tied to a specific bit, Baltic birch plywood, stated cutting conditions, a measured distance, and a functional point for retiring the tool. That’s good evidence for the example as documented. It isn’t a replacement interval for a different router bit or process. The company’s separate microtool guidance also names material properties, feed, spindle speed, acceleration, and spindle runout among the things that affect performance and tool life.
So your log should keep exposure as context next to condition and output evidence, not turn it into a universal limit.
Give every physical bit its own shop ID
Start with an ID that belongs to one physical tool, not a product type. “Quarter-inch compression bit” is a catalog description. An ID like CB-024 (just an example) is a shop identity. If three matching bits arrive together, they get three different IDs.
For each ID, keep the manufacturer’s name and exact catalog or part number, the relevant dimensions and geometry, the substrate and coating where the maker specifies them, and the date you put it in service. Point to the approved holder or assembly instead of assuming any collet or holder that looks right is equivalent.
Keep the ID visible in the record and on labeled storage, so nobody mixes the tool up with its neighbors. Only mark or label the tool itself in ways the tool and machine manufacturers allow. Don’t alter a cutting tool to make your system more convenient. A label tells you which tool it is, but it says nothing about whether the tool is safe or fit to use.
Stop silent swaps
When you pull a bit, put it back only in the spot for its ID and status. If you’re not sure which tool it is, hold it as unidentified rather than giving it another tool’s history. If an operator swaps a tool mid-run, write down the outgoing ID, the incoming ID, the time or operation, and the affected parts. Don’t leave the old ID in the run record just because the replacement shares its catalog number.
Physically separate active, held, service-bound, and retired tools. A retired or questionable bit shouldn’t be able to drift back into active storage. Quarantine controls status. It doesn’t prove a tool is safe to handle or reuse.
Link jobs without rebuilding the setup record
The bit life log and the CNC repeat-run setup record answer different questions.
Your setup record owns the approved job revision, stock, origin, workholding, program, tool assignment, and first-piece release for a run. The bit life log owns the history of one physical cutter across many runs. Link each tool entry to the run or batch ID, material class, operation, and setup record, but don’t paste the whole setup sheet into the tool log.
Only capture an exposure measure if your shop can get it consistently. That might be cutting time from the controller, an exported cutting distance, sheets or parts processed, or another defined measure. Name the measure and its units, and mark estimates as estimates. A bare number isn’t useful history.
Give enough material detail to make sense of the exposure. “Wood” is too broad. Use the material identity or class the job record already controls, and note any contamination or surface treatment you know about. Just don’t turn the tool log into a second purchasing or stock database.
Record evidence, not a verdict disguised as a note
“Still good” skips the observation and jumps straight to a conclusion. Better entries keep what you saw separate from what you decided.
Useful output evidence can include results against the job’s existing acceptance criteria: edge or surface condition, dimensional results with units, extra cleanup needed, or a comparison with an approved sample. Describe the operation and material too, because a pass on one job doesn’t qualify the tool for every other use.
Condition evidence only counts if it comes from checks authorized for that exact tool, done by a trained operator with the machine in the safe state its instructions require. Record the procedure or manufacturer document, the result, who did it, and the date. Don’t make up a wear threshold or borrow an inspection method from another brand or cutter design.
Harvey Performance’s overview of four tool-wear types is an industrial end-mill resource, not a replacement chart for desktop routers. It does show why observations matter, though. The manufacturer covers wear patterns, chipping, cracking, and fracture, and points out that a part’s surface finish can reveal possible chipping. Use it as background for recording evidence and escalating when you’re unsure, not as permission to diagnose every router bit by eye.
Make abnormal events impossible to bury
A total exposure number can hide the one event that matters most. Add an event entry whenever the process strays from the approved run: a collision or suspected contact, unexpected vibration or noise, visible burning, chips that stop clearing, workholding that moves, an interrupted cut, a spindle or holder concern, an unexplained change in output, or any other alarm or incident the machine defines.
Write down what you saw without guessing at the cause. Tie the event to the run, the operation, the time or point in the sequence, and any parts that might be affected. Follow the machine, tool, holder, and shop procedures for stopping, safe access, inspection, part control, and restarting. If the required checks can’t establish the tool’s condition, keep the tool and affected work on hold for the responsible person.
Logging an event doesn’t make the tool fit to keep cutting. It just keeps the event from vanishing when the shift changes or the bit goes back in a drawer.
Keep care and service manufacturer-specific
Cleaning, inspection, storage, and service instructions aren’t interchangeable. Cutter materials, coatings, brazed joints, bearings, replaceable parts, and approved chemicals all differ.
Only log care once you’ve completed it under the current instructions for that exact tool and its assembly. Name the document or procedure, with its revision or the date you accessed it where practical, and record the result. Don’t write “cleaned” if nobody identified the approved process.
Sharpening follows the same rule. Don’t sharpen a CNC bit based on a generic article, and don’t send every dull-looking tool to the same service. First confirm that the exact manufacturer allows service for that product, and which route it recognizes. Freud, for example, keeps a directory of certified sharpeners for Freud products. That supports a Freud-specific service path. It doesn’t authorize a listed shop to service every cutter, and it doesn’t prove a particular tool is still serviceable.
If the manufacturer doesn’t allow or define a suitable route, or the tool’s condition is uncertain, hold or retire it under your shop’s authority. The log documents that decision. It doesn’t teach repair.
Keep status, service, and release separate
Every tool and every history entry should end with one current use status and a named person who owns the decision:
- Active for a defined approved use: the evidence supports only the stated use and process. It isn’t a blanket “safe” label, and it doesn’t cover other materials, jobs, holders, or settings.
- Hold for review: identity, condition, process, event history, or output needs competent review before the tool runs again.
- Retire: take the tool out of active service and control it so nobody can quietly put it back.
Your shop procedure should name which roles can place a hold, approve a manufacturer-permitted service, retire a tool, and release a held tool. Writing down an observation doesn’t give anyone release authority.
Sending a held tool out for service
If you send a held tool out for service, keep its ID and its held status. Record the manufacturer’s permission or route, the provider, outbound and return dates, service paperwork, and any change to geometry or identification. A tool that comes back from service stays on hold until the authorized person reviews the evidence and documents a release for a defined approved use. If the service effectively creates a different tool, follow the manufacturer’s and your shop’s rules for identifying and validating it.
Set a trigger for the next review instead of inventing a universal interval. The trigger might be the next use, a defined process event, an exposure point your shop has approved, a change in output, or a return from service. It has to come from applicable guidance and your shop’s competent process, not from a number copied out of context.
Copy this CNC bit life log
Use one master record per physical tool, plus dated history entries. The structure below is a starting point for trained operators working under machine, tool, holder, and shop procedures. It doesn’t define inspection methods, wear limits, cutting settings, or permission to run.
Tool identity and current status
| Field | Entry |
|---|---|
| Unique shop tool ID | |
| Manufacturer and exact catalog/part number | |
| Tool type; relevant geometry and dimensions | |
| Substrate/coating, if manufacturer-specified | |
| Date received / date placed in service | |
| Approved holder or assembly reference | |
| Applicable tool, holder, machine, and shop procedure references | |
| Labeled active storage location | |
| Current use status | Active for stated approved use / Hold / Retire |
| Approved-use scope, if active | |
| Unknown or incomplete prior history | No / Yes; describe the gap without guessing |
| Hold reason and controlled location | |
| Workflow action | Inspect / Escalate / Manufacturer-permitted service / Receive from service / Other controlled action |
| Decision type; role/name; date | |
| Authority or procedure reference | |
| Evidence reviewed and decision basis | |
| Release record, if applicable | Authorized role/name; release date; defined approved-use scope |
| Service record, if applicable | Manufacturer permission/source; provider; outbound/return dates; documents; geometry/identity changes |
| Next review trigger and source/authority | |
| Retired storage or disposal-control reference |
Dated history entry
| Field | Entry |
|---|---|
| Date; operator | |
| Linked job/run/batch and operation | |
| Material identity or controlled material class | |
| Exposure measure, value, and units | |
| Capture method; actual or estimated | |
| Output evidence against existing job criteria | |
| Condition evidence under exact applicable guidance | |
| Cleaning/inspection performed; document/procedure reference | |
| Abnormal event or “none reported” | |
| Event sequence/time; affected run and part IDs | |
| Action taken and escalation reference | |
| Current use status after entry | Active for stated approved use / Hold / Retire |
| Hold reason, controlled location, and workflow action | |
| Decision type; role/name; authority reference; date | |
| Evidence reviewed; decision basis; approved-use scope if released | |
| Service details or release record, if applicable | |
| Next review trigger | |
| Supporting record/photo/report link |
Write “not applicable” or “not captured” with a reason instead of leaving an ambiguous blank. Keep earlier entries, and fix mistakes with a dated amendment instead of erasing history.
Start with the tools that create the most uncertainty
You don’t need to invent a backstory for every bit in the shop. Start by assigning IDs and an honest status. A used cutter with seriously incomplete identity, exposure, abnormal-event, or service history starts on hold, not active. Don’t reconstruct or assume the missing history. An authorized reviewer can release it only after documenting the available evidence, the basis for the decision, and a defined approved use. If the evidence isn’t enough, keep it held or retire it.
Then try the log on a few tools you use often. See whether operators can tell identical-looking bits apart, link a tool to a run without duplicating the run sheet, record material and exposure with units, find the right care guidance, and understand who can release a hold.
Our CNC bits, feeds, and finishes guide covers choosing bits and broader cut quality. The small CNC business mistakes guide covers the wider cost of preventable operating problems. This log has a narrower job: keep a tool’s identity and condition evidence around long enough to support the next decision.
A calendar can remind you to review a record. It can’t tell you what happened to the cutter. The useful question isn’t “Is this bit old?” It’s “What do we know about this exact tool, and is that enough for the responsible person to decide what happens next?”
FAQ
How many hours should a CNC router bit last?
There’s no universal answer. Tool geometry, material, coating, settings, machine and holder condition, chip evacuation, workholding, heat, contamination, and abnormal events all change what elapsed time means. Go by the exact manufacturer’s guidance and your approved process, and record hours only as one piece of context, with units and how you captured them.
Can job count alone tell me when to replace a CNC bit?
No. Jobs vary in material, operation, length, and cutting conditions. A job count can help you find history, but pair it with material and exposure context, output evidence, the right condition checks, and the event history.
Should matching bits share one log?
Keep a catalog-level reference if it helps, but give each physical bit its own shop ID and history. Otherwise a damaged or heavily used tool can inherit the cleaner history of the bit next to it.
Does a rough cut prove the bit is worn out?
Not by itself. A change in output is evidence to record and review, but setup, material, workholding, the holder, machine condition, chip evacuation, and process settings can all play a part. Hold the tool or the run when your procedure calls for it, and use the relevant troubleshooting and inspection procedures instead of guessing at the cause.
Can I sharpen a CNC router bit myself?
This log doesn’t cover sharpening. Check whether the exact tool’s manufacturer allows sharpening or service, and which qualified or authorized route applies. If you can’t establish that, or the tool’s condition is uncertain, keep it on hold or retire it under your shop’s procedure.