
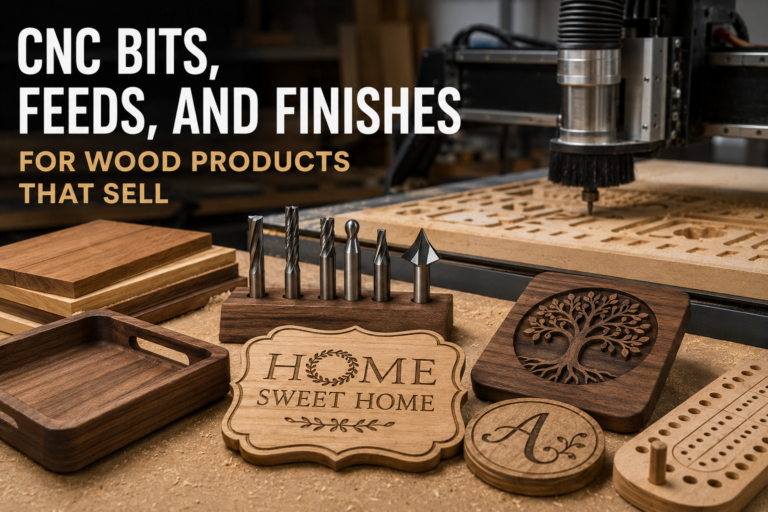
A lot of CNC product ideas look profitable right up until the cleanup starts.
The carve itself may only take a few minutes. Then comes the fuzz in plywood, tearout on the top veneer, chatter marks inside letters, tabs that need more cleanup than expected, edges that still feel sharp, and a finish that looks different from one batch to the next. That’s where many small-shop CNC products quietly lose margin.
Sellable CNC work isn’t just a design question. It’s a process question.
If you’re still learning the machine side, Beginner’s Guide to CNC Machines is the right foundation. If you’re evaluating compact production setups, Makera Z1 for Small Business helps frame where a desktop CNC fits and where it doesn’t. And if your goal is product selection for booth season, CNC Products That Actually Sell at Summer Markets pairs well with this article because it focuses on what tends to sell rather than how to machine it.
This guide is about the production layer in the middle: the practical decisions around bits, feeds, workholding, sanding, and finishing that make wood products easier to repeat and easier to sell.
The Goal Is Repeatable Product Quality
Small CNC shops sometimes chase settings that look impressive in a screenshot instead of settings that hold up in production.
A customer-ready wood product needs a simpler standard:
- the cut is clean enough that sanding stays controlled
- the dimensions stay consistent from piece to piece
- the edge quality looks intentional
- the finish behaves predictably
- the process works again next week without relearning everything
That last point matters. A shop doesn’t become easier to run because one sign came off the machine beautifully. It becomes easier to run when the second, twelfth, and fiftieth piece come out close enough that finishing, pricing, packaging, and repeat orders stay under control.
Start with the Product, Then Choose the Bit
One of the easiest ways to create extra cleanup is to choose bits by habit instead of by product geometry.
There’s no single best CNC bit for wood products because a V-carved sign, a tray pocket, a profile-cut coaster, and a cribbage board all ask for different things. Most small shops end up using a few core categories.
End Mills for Clearing, Profiling, and General Production
Straight or spiral end mills do the bulk of practical CNC work. They’re the everyday tools for pocketing, profiling, flattening certain features, and cutting parts free.
In broad terms:
- upcut bits evacuate chips well and can help keep cuts cooler, but they may lift fibers on the top surface
- downcut bits usually leave a cleaner top edge, but they push chips downward and can pack dust in deeper cuts
- compression bits can help with cleaner top and bottom edges in sheet goods when the cut depth allows both cutting directions to engage properly
For production work, the choice usually comes down to which surface needs to look best with the least rescue work. If you’re cutting plywood signs or organizers where the top veneer matters, a downcut or compression bit may save finishing time. If you’re clearing deeper pockets in hardwood, chip evacuation may matter more.
Ball Nose Bits for Contours and Softer 3D Shaping
If the product includes curved trays, topographic details, sculpted dish forms, or decorative relief work, ball nose bits help leave smoother transitions than a flat end mill.
That doesn’t mean they remove sanding entirely. It means the marks are usually more predictable for contoured work. On products where the shape itself is the selling feature, bit choice can determine whether the piece looks premium or merely machine-made.
V-Bits for Lettering, Borders, and Sign Detail
V-bits matter most when the product’s perceived quality lives in engraved detail. Signs, monograms, logos, measurement marks, decorative borders, and chamfered accents all depend on crisp geometry.
When V-carving looks rough, customers notice quickly because the eye goes straight to letters and linework. If your shop sells products where names, phrases, or logo-like details drive the value, V-bit sharpness and setup discipline deserve more attention than another clever product idea.
Surfacing Bits for Spoilboard and Stock Prep
This isn’t the glamorous tool in the drawer, but it protects repeatability.
A neglected spoilboard can contribute to inconsistent depth, weak onion-skin cuts, through-cuts that fail in some corners, and finishing problems that seem random until you realize the work surface isn’t truly flat. If you’re producing sellable products regularly, spoilboard maintenance is part of quality control.
Feeds and Speeds Should Be Judged by Cleanup, Heat, and Cut Quality
Feeds and speeds can become a rabbit hole fast. Every machine, spindle, router, bit diameter, material, and setup changes the details.
Instead of pretending there’s one magic chart for everyone, watch for practical signals.
What Bad Settings Usually Look Like
Even without advanced measurement tools, a few warning signs tend to show up clearly:
- burning or darkened edges
- rough walls or chatter
- excessive fuzzing or torn grain
- poor chip evacuation
- squealing that sounds wrong before the cut ends
- bits dulling faster than expected
- a product that needs much more sanding than the design should require
In production terms, the issue isn’t only machine stress. It’s downstream labor. If your settings leave every coaster edge needing rescue sanding, the machine didn’t really save you time.
A Practical Way to Tune Settings
For most small shops, the realistic approach is controlled iteration.
Change one major variable at a time, test on the actual material you plan to sell, label the sample, and keep notes. That sounds basic, but it’s one of the clearest differences between “we made it work once” and “we can build a repeatable product line.”
Track:
- material species or sheet type
- bit type and diameter
- depth of cut
- spindle or router setting
- feed rate
- pass count
- surface quality after machining
- sanding time after machining
That last line deserves a place in your notes. A setting that cuts slightly slower but saves ten minutes of cleanup per batch may be the better production setting.
Materials Change the Answer
Plywood, MDF, maple, walnut, bamboo, and cheap craft-board blanks don’t behave the same way.
A setting that works acceptably in one plywood may tear another veneer badly. A hardwood that machines cleanly with one grain direction may fuzz more on end-grain details. MDF can be predictable for painted products, but the dust and finishing behavior create their own tradeoffs.
Generic online settings should be treated as starting points, not promises.
Workholding Affects Finish Quality More Than Beginners Expect
When a part shifts, vibrates, lifts, or flexes, the problem rarely stays hidden in the cut. It shows up later as ugly edges, inconsistent depth, chatter, or a piece that suddenly feels like more labor than it should have been.
Good workholding isn’t just about keeping stock from flying loose. It’s about keeping the cut stable enough that the product finishes predictably.
Match the Workholding Method to the Product
Depending on the part, small shops may use clamps, double-sided tape, painter’s tape and CA glue methods, threaded inserts, fixture plates, vacuum setups, or simple dedicated jigs.
The right question isn’t which method sounds most advanced. It’s which method keeps this specific product secure without getting in the cutter’s way or slowing setup too much.
For sellable products, good workholding should help with reliable placement, cleaner edge quality, lower scrap risk, faster repeat setup, and safer confidence when running multiple copies.
Fixtures Are Often Worth It Sooner Than People Think
If you make the same tray, sign blank, key holder, or organizer repeatedly, a simple fixture can remove a lot of variation.
That can mean more consistent zeroing, easier part registration, cleaner two-sided operations, and less chance of ruining a nearly finished piece because the stock sat slightly differently than it did last time.
Fixtures feel like extra work until you compare them with rework, misalignment, and scrap.
Tearout Control Is a Business Issue
Tearout is one of the fastest ways for a wood product to stop feeling sellable.
It may still be structurally fine, but the product starts to look cheaper, more rushed, or more fragile. Once tearout appears in a visible place, you may spend more time disguising it than the piece can economically support.
Where Tearout Tends to Matter Most
For many products, the worst places are:
- top veneer edges on plywood signs and organizers
- exit edges on profile cuts
- small interior corners around letters or icons
- cross-grain details on decorative shapes
- thin tabs or narrow bridges in detailed work
Ways to Reduce Tearout Pressure
Without pretending every setup is the same, a few habits tend to help:
- use sharp bits instead of pushing dull ones too long
- choose bit geometry that suits the visible surface you care about most
- support the stock well and keep it flat
- avoid rushing unknown materials at aggressive settings
- test sheet goods before committing expensive blanks to a batch
- leave room in the product design for edge softening rather than requiring razor-fragile details
Design discipline belongs here too. A product that depends on ultra-thin details in weak plywood may be a design problem as much as a feeds-and-speeds problem.
Sanding Is Part of CNC Production, So Price It Like It Matters
A lot of CNC product math breaks here.
The machine time looks acceptable. The wood cost looks acceptable. Then the actual batch spends an hour in edge cleanup, another hour in detail sanding, and more time blowing dust out of carved recesses before finish can even start.
That’s why sanding isn’t the embarrassing afterthought of CNC production. It’s part of the workflow.
Design for Cleanup, Not Just for Toolpaths
Before adding another internal corner, tiny recess, or decorative texture, ask a simple question: how will this be sanded and inspected repeatedly?
A product that’s visually interesting but miserable to clean may still work as a premium custom item. It’s harder to defend as a repeatable small-shop SKU.
Standardize Your Sanding Sequence
A repeatable sanding routine can protect both quality and time. That may include:
- a standard grit progression for specific product types
- clear rules for when machine marks are acceptable and when they aren’t
- dedicated detail-sanding tools or contour pads for inside curves
- a dust-removal step before finish
- a final hand-check for edges that still feel sharp in the hand
Customers may not know which grit you used, but they notice when a product feels rough, dusty, splinter-prone, or unfinished around the edges.
Finishes Need to Fit the Product and the Production Schedule
Finishing is where wood products either start looking truly sellable or where the workflow falls apart.
A carved tray that takes too long to dry, stays inconsistent in color, or highlights every machining defect may not fit the business even if it looks good once finished carefully.
Match the Finish to the Product’s Real Job
Decor signs, trays, coasters, organizers, shelves, and food-adjacent boards don’t all need the same finish strategy.
What matters practically:
- how much handling the product will get
- whether moisture resistance matters
- whether a low-sheen or higher-sheen look matches the brand
- whether the finish is forgiving over small machining variation
- how long the finish takes before the piece can be packed or displayed
A finish that looks great but bottlenecks production isn’t always the right finish for a growing product line.
Test the Whole Stack, Not Just the Finish
Wood species, sanding level, stain choice, seal coat, topcoat, and curing time all affect the final impression.
If you plan to sell a product regularly, test the full finishing stack on actual offcuts or sample pieces from the same material class. The point isn’t to become precious about samples. The point is to avoid discovering too late that one plywood darkens unevenly, one stain muddies carved detail, or one topcoat emphasizes swirl marks you thought would disappear.
Dry Time and Cure Time Belong in Your Pricing
This is one of the quietest margin killers in wood-product shops.
Even when the labor is light, finish time can slow cash flow, eat storage space, and reduce how quickly inventory can move through the shop. If a product line only works when every piece gets a slow, careful finishing schedule, the price needs to reflect that reality.
If you aren’t sure the total math is being captured, use the Product Pricing Calculator as a starting point, then sanity-check whether it reflects your real finishing and drying delays.
Dust Control and Spoilboard Habits Support Consistency
Dust collection is easy to think of as a shop-comfort topic, but it also affects product quality and cleanup.
Heavy dust buildup can interfere with visibility, chip evacuation, cleanup between operations, and how cleanly a part reaches the sanding and finishing stage. The same goes for a spoilboard that has seen too many jobs without resurfacing or replacement.
For repeatable products, boring maintenance habits matter: keep dust collection working, clear debris before it affects cut quality, surface or replace spoilboards before depth consistency drifts too far, inspect hold-down methods before blaming software, and use calipers or other simple tools to confirm whether parts are actually as consistent as they look.
None of that sounds exciting. All of it supports repeatability.
What “Good Enough” Looks Like for Products You Plan to Sell
Not every CNC wood product needs museum-level perfection.
But “good enough” for a sellable product usually means:
- no obvious tearout in the areas customers notice first
- edges that feel intentional in the hand
- dimensions that stay consistent enough for packaging and repeat orders
- a finish that matches from one batch to the next closely enough to build trust
- a workflow where sanding and finishing don’t erase the product’s margin
That standard is practical, but it isn’t casual. It asks you to think like an operator, not just like a designer.
FAQ
What CNC bit is best for wood products you plan to sell?
There’s no single best bit for every product. Small shops usually rely on a mix of end mills for pockets and profiles, V-bits for lettering and sign detail, ball nose bits for contours, and surfacing bits for spoilboard maintenance. The right choice depends on the visible surface quality you need and how much cleanup the bit leaves behind.
How do I know if my feed and speed settings are hurting profitability?
A practical clue is excessive downstream labor. If the settings leave burning, chatter, fuzz, tearout, or edges that need too much sanding, the process may be costing more than it looks on the machine. Track sanding and cleanup time along with cut settings, not just runtime.
Are downcut or compression bits better for plywood products?
Often, yes, when top-surface cleanliness matters. They can help reduce visible tearout in sheet goods, especially for signs and profile-cut products. But exact performance depends on material quality, depth of cut, machine setup, and whether the bit is sharp.
Why do my CNC products still take so long after machining?
Because the cut is only part of the job. Workholding, spoilboard flatness, edge cleanup, detail sanding, dust removal, finishing, drying time, and inspection all affect the real production timeline. Many small shops underestimate everything that happens after the router stops.
Final Takeaway
The best CNC setup for a sellable wood product isn’t the one that merely survives the cut.
It’s the combination of tools, settings, and shop habits that creates a product you can repeat without drama: the right bit for the geometry, feeds that leave manageable cleanup, workholding that keeps parts stable, spoilboards that stay flat enough to trust, sanding routines that are honest about labor, and finishes that fit both the product and the schedule.
If your CNC products feel harder to profit from than they should, look beyond the toolpath preview. The fix may be less about making the carve faster and more about making the whole process cleaner, calmer, and easier to repeat.
[…] earlier CNC Bits, Feeds, and Finishes for Wood Products That Sell in 2026 covers the cut-quality side. This is the operating side: even a decent toolpath cannot fully rescue […]
[…] For more on the production-quality side, see: CNC Bits, Feeds, and Finishes for Sellable Wood Products in 2026. […]