
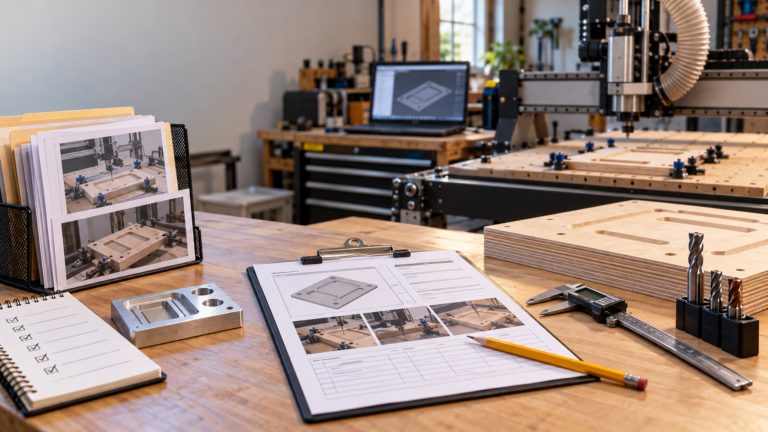
The order’s familiar. The setup isn’t.
You remember making this part, but the folder has three exports in it. The cutter in the drawer looks right. There’s a phone photo from the last batch, except the stock edge you need is just outside the frame. Before you’ve cut anything, you’re rebuilding decisions you already made once.
A CNC setup sheet for a small shop should answer those questions without trying to be a machine manual. Its job is to connect a process you’ve already validated to the next run: which material, which approved files, which origin, which existing workholding, which tools, and what has to pass inspection before the batch carries on.
What it won’t do is make an unproven setup safe. Follow the guidance from your machine, tool, material, and workholding manufacturers, along with your shop’s own approved procedures. And if today’s job no longer matches the process you validated, stop treating it as a routine repeat.
Give the approved process and each run separate identities
Keep one controlled master setup record for the job, then start a dated run record every time you make it. The master says what’s approved. The run record says what was actually used, checked, and released today.
Say the master is labeled “part P-017, setup revision C.” Today’s run gets its own batch ID and points back to revision C. (Those labels are just examples, not a machining spec.) What matters is the separation: a note scribbled during today’s run can’t quietly rewrite what the next operator assumes is approved.
Store the master alongside the drawing or product spec, the CAM project, machine-ready programs, inspection requirements, and labeled setup photos. Move superseded versions out of the active run folder, but keep the history. One clearly marked approved version beats a folder full of files called “final,” “final-new,” and “use-this.”
Our broader small CNC business mistakes guide explains why undocumented setups and hidden labor add up. This article has a narrower goal: make one established job easy to find and easy to check. You don’t need to redesign the whole shop.
Record the stock you actually plan to load
“Same plywood” isn’t a stock reference. Note the supplier’s product or material spec, the receipt or lot number where you have one, and the blank dimensions the approved process needs, with units. Keep the nominal thickness you bought separate from the measurements your setup actually depends on.
Write down whichever face, edge, grain direction, or orientation matters for this job, and tie it to a labeled sketch or photo instead of “the good side.” If a blank has a prepared reference face, call it out. A second operator shouldn’t have to work it out from a finished sample.
On the run record, note today’s stock and log the checks the master calls for: dimensions, condition, orientation, and whether it suits the existing holding setup. Use measuring tools that match the acceptance limits you need. A supplier label tells you what the material is. It doesn’t prove every blank meets the approved spec.
A different thickness, construction, coating, or blank size is a change to review. It’s not an excuse to stretch the old instructions. Note the discrepancy and hold the run until whoever’s responsible decides whether the established process still applies.
Tie the toolpath revision to the file at the controller
The CAM project you saved and the program loaded at the machine aren’t automatically the same revision. Record both, plus the drawing revision, operation order, target machine, units, and the post-processor name or version you’d need to reproduce the approved output.
Give every machine-ready program an unambiguous ID. Before you release a run, compare the program selected at the controller against the approved record. Matching filenames help, but a filename can survive an overwrite. Keep an approved export somewhere controlled, and use your shop’s file-comparison or checksum process if you have one. Don’t just trust whichever copy was modified most recently.
Keep approved settings with the approved revision
Point to the validated operation settings in the CAM record or a controlled setup attachment. If your sheet repeats values like feed, spindle setting, or cutting depth, include units and keep them in sync with the approved program. Two conflicting copies are worse than one clearly identified source.
This isn’t the place for universal feeds and speeds. Laticy’s CNC bits, feeds, and finishes guide gives broader cut-quality context, but it can’t approve your particular setup. Go by manufacturer guidance and the settings you’ve already validated for the actual machine, tool, material, and operation.
If someone tweaks a toolpath to clean up an edge or handle new stock, save that as a candidate revision. It only becomes the master after it’s been reviewed, validated, and approved. Being the newer export doesn’t count.
Make the origin and existing workholding unambiguous
“Zero at the corner” leaves too much unsaid. Spell out the specific stock or fixture reference, the X/Y reference location, the Z reference surface, and the work coordinate system the approved program uses. Show orientation from a named viewpoint. If the job has multiple setups, give each operation its own reference details.
Record the approved method for setting and checking those references, including the procedure ID. Machine homing and a job’s work origin aren’t the same thing, and your setup record shouldn’t treat the terms as interchangeable. Follow the controller and machine documentation rather than copying an offset from an old run and hoping it still holds.
Use photos as references, not proof
A good setup photo labels the machine orientation, reference edges, fixture ID, and the existing holding arrangement. Pair it with a drawing or written procedure wherever the photo can’t clearly show a critical relationship. Take it with the machine in whatever safe state its instructions require. Never reach into a running machine for a better shot.
Record the validated fixture or workholding assembly’s ID and revision, the relevant installation procedure, and the checks needed before use. Include the support surface or spoilboard reference if it affects this setup. Document the existing hold-down arrangement through the whole approved operation sequence. Don’t invent a new clamp layout on the sheet.
A photo can’t tell you holding force, current condition, or clearance. The real setup still needs the prescribed checks, including confirming that the approved program and tool assembly still work with what’s installed. If a fixture is damaged, a reference surface has changed, or a component is missing, an old photo doesn’t authorize a substitute.
Identify the cutting tool, not just its drawer
“Small end mill” jogs your memory. It doesn’t identify anything. Link each operation or program tool number to the manufacturer’s tool ID, the relevant geometry and dimensions, and your shop’s tool ID if you use one. Include the approved holder or collet assembly and whichever installation or tool-length procedure applies.
Record the assembly details from the validated setup, including projection or length references where they matter. Don’t turn an old handwritten measurement into a permanent rule. The tool and holder manufacturers’ requirements still apply, and a replacement tool has to be checked for compatibility. A matching nominal diameter isn’t enough.
On the run record, note which tool went in and that its condition and ID were checked under your shop’s procedure. If the controller uses a tool library, confirm the selected entry matches the physical tool and the approved program. A familiar library name doesn’t prove nobody’s edited it.
Tool changes, damaged tools, and altered assemblies all need the appropriate recheck before you continue. Log the event and which parts it affected, so a later inspection can connect a problem to when it started.
Make first-piece inspection a release decision
Define what acceptable means before you cut the first piece. Point to the drawing or product spec and list the dimensions, features, orientation, and surface conditions that matter. Note the inspection method, the measuring equipment, and the actual limits from the approved spec. Don’t borrow a tolerance from some unrelated job.
Run the machine-specific pre-run and setup checks before machining. Then inspect the first piece at the right safe stage, following the machine’s handling and isolation rules. The setup sheet records those checks. It doesn’t replace them.
Write the result beside the requirement
“Looks good” hides the most useful evidence you have. Record real measurements, with units, wherever dimensions are specified. For appearance, name the approved reference sample or written criteria and record the result against them. Keep the first piece’s ID linked to the batch, program revision, stock, and tool information.
A retained sample helps with visual comparison, but it can’t stand in for dimensional requirements. It works the other way, too: a passing dimension doesn’t tell you the visible face or personalized content is right.
Give the decision a name, a date, and a scope: released for this run under the stated process, held for investigation, or rejected. In a one-person shop, the operator might also be the approver. That’s fine. Just record both roles honestly instead of inventing a second signature. If an independent check is required, signing off on your own work doesn’t replace it.
A good first piece doesn’t certify every part after it. Follow the job’s in-process inspection plan, and spell out what triggers another check: a tool change, new stock, an interrupted setup, or an adjustment. If there’s no defined acceptance standard or inspection plan yet, fix that before you call the batch released.
Copy this repeat-run record into your job folder
Keep the working sheet short enough to use at the machine, with clear pointers to the supporting documents. The fields below are a starting structure for your own established process. They aren’t permission to run a machine or skip its procedures.
| Record field | What belongs here |
|---|---|
| Job and approval | Part/SKU, drawing revision, master setup revision, approval owner and date; today’s run ID, date, and operator |
| Stock reference | Approved material and blank specification, units and orientation; today’s supplier/receipt/lot, measured checks, and result |
| Program identity | Approved CAM and machine-ready filenames/revisions, machine, units, post-processor, operation order; controller file comparison result |
| Process settings | Controlled reference to already validated settings; any repeated values must match the approved source |
| Origin | Reference sketch, X/Y location, Z surface, work coordinate system, and approved establishment/verification procedure for each setup |
| Existing workholding | Fixture/assembly ID and revision, support-surface reference, approved installation procedure, labeled photos, required condition and clearance checks |
| Tools | Operation/tool number, manufacturer and shop IDs, geometry, approved holder/assembly reference, condition and identification checks |
| Pre-run checks | Applicable machine and shop procedure IDs, results, checker, and unresolved discrepancies |
| First piece | Piece ID, specification and sample references, inspection method/equipment, requirements, actual results, and disposition |
| Run release | Release/hold/reject, scope, authorized name and date; in-process plan and recheck triggers |
| Closeout | Accepted, held, and rejected quantities; deviations, affected piece IDs, follow-up owner, and proposed master changes |
Where something doesn’t apply, write “not applicable” and say why. A blank could mean “checked and irrelevant” or “forgot,” and nobody can tell which. A QR code or folder link can point to supporting evidence, but make sure the operator can open the right revision without digging through personal messages.
A mismatch should trigger a hold, not a guess
Say the master names a particular reference face, but today’s prepared blanks don’t have it clearly marked anymore. The file and tool might match perfectly. That still doesn’t answer the origin question.
Log the discrepancy, hold the run, and have the responsible operator sort out the stock orientation against the approved process. If the fix needs a process change, send it through review and validation. Keep the original observation in the run record instead of deleting it once the problem’s solved. That’s how the next person finds out what happened without having to rediscover it.
Close the run without quietly rewriting the master
At closeout, reconcile the parts made, accepted, held, and rejected, and note any interrupted operations or loose ends. Separate the temporary observations from the changes that need formal review. Store inspection results with the run, not in some unrelated photo album.
Keep downstream finishing separate. If parts need more cleanup than the accepted standard allows, flag it. Extra sanding isn’t proof the setup passed. Our CNC sanding and finishing bottleneck article covers downstream planning; this record stops at a traceable machining and inspection handoff, not a new finishing recipe.
Before the next repeat, have a trained operator pull up the approved files and walk through the stock, origin, tools, and inspection decision using only the record. Treat it as a document review, not an unsupervised test cut. Any question they can’t answer shows you where the record needs work.
The point isn’t more paperwork. It’s to stop paying for the same investigation every time an established job comes back, and to make sure a changed condition gets noticed before familiarity turns into a guess.
FAQ
Is a CAM-generated setup sheet enough?
It can cover useful program, tool, and stock details. Check what it leaves out, though. Today’s material identity, the physical condition of the workholding, actual origin verification, first-piece results, and release sign-off usually need a separate run record. An export describes its source data. It can’t prove the machine matches it.
Can I reuse the last run’s work offsets?
Don’t assume they’re still valid. Follow the machine-specific procedure to set and verify the current work references, and confirm they match the approved program. A saved offset is history. It doesn’t tell you the stock, fixture, or reference surfaces are unchanged.
When does a repeat job need a new setup revision?
Whenever an approved process detail changes, send it through your change-control procedure. Material spec, program, origin, workholding, tooling, and inspection requirements can all count. A new run date on its own doesn’t need a new master revision, but a process change shouldn’t be allowed to hide inside one either.