
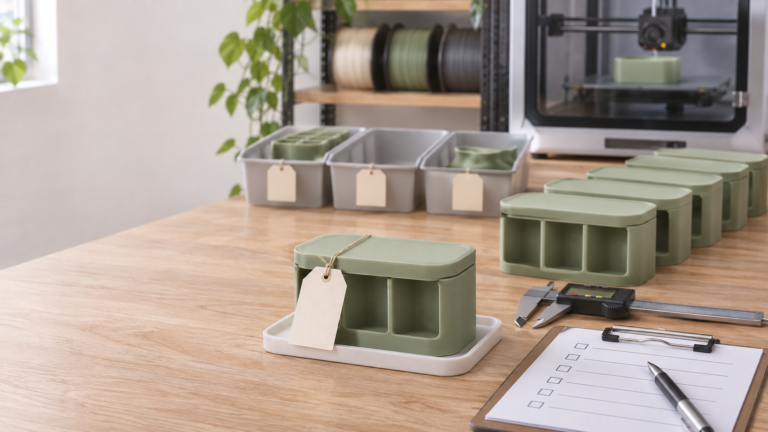
The first print looks right. The name’s correct, the visible surfaces are clean, and the mating part seems to fit. It’s tempting to set it beside the printer and treat the rest of the run as approved.
That isn’t a batch release system.
A real 3D print batch release starts with one identified piece that you accept against requirements you wrote down before production. That release sample stays tied to the approved model and export, the slicer project, the printer and tool setup, the material, the orientation, the post-processing, and the batch it released. A matching record shows what you checked, what happened later, and which pieces you accepted, held, sent to rework, or rejected.
The sample helps an operator compare things you can see and feel. It can’t prove dimensions, hidden internal structure, strength, long-term durability, food-contact suitability, child safety, load-bearing performance, electrical or medical suitability, or regulatory compliance. Each of those claims needs its own requirements, methods, evidence, and competent review.
The goal here is narrower: stop a mixed revision, a changed process, or a questionable piece from reaching packaging just because the first item looked good.
Define what’s approved before you name a release sample
Start with the product, not the printer. Give the product or SKU a clear identity and point to its current specification. For a personalized order, link the approved customer proof and the order details too. The broader repeatable custom-order workflow covers intake, proofs, payment, and handing off production files. This record picks up once you have a defined product ready for controlled production.
Identify both the editable model and the exported geometry you slice. A model revision, an export revision, and a slicer project relate to each other, but they aren’t interchangeable names. If you repaired, scaled, split, or re-exported a mesh, keep that history instead of letting a file called “final.3mf” hide the change.
Record the slicer project, not just the model
Write down the slicer and its version, the project file, and the approved printer, material, and process profiles. Also note the printer, the nozzle or other active tool, the build surface where it matters, part orientation, support decisions, and the post-processing route. Don’t borrow a setting from another printer or filament because its label sounds similar. Follow the current instructions from every relevant printer, slicer, material, and accessory manufacturer, along with your shop’s approved procedure for the product. Sort out any gaps or conflicts before release instead of assuming one source covers the whole combination.
This separation isn’t paperwork for its own sake. Bambu Lab’s documentation explains that a Bambu Studio 3MF project can hold object geometry, slicing parameters and modifiers, plate layout, manually added supports, and related project resources. Its preset documentation treats printer, filament, and process presets separately. These vendor-specific examples show why “we saved the model” doesn’t give you a complete production identity. They don’t tell you what another slicer keeps or how another application will read the project. See Bambu Lab’s project-based workflow and preset documentation.
Before you treat the archived project as the master, reopen it through your controlled workflow and confirm the intended profiles, assignments, orientation, supports, and plate contents are all there. A project file preserves information. It can’t prove that the physical printer, loaded material, tool, or later output still matches it.
Give the material a traceable identity
“Black PLA” isn’t enough. Note the manufacturer, the exact product and any formulation name it lists, the color, the diameter or other relevant spec, and the supplier or receipt reference. Keep the manufacturer or supplier lot number when one exists. If you don’t get one, assign your own receipt ID and label it as internal, because it doesn’t identify a manufacturing lot.
Keep visibly different spools, receipts, colors, or formulations apart until your approved procedure says you can group them. A broad family name doesn’t make two products interchangeable. Prusa’s filament material guide, for example, separates material families and lists different properties and printing considerations for each. Treat it as a comparison aid. It doesn’t certify your finished product, and it isn’t a settings source for unrelated printers or brands.
Record the material you actually used for the release piece and the batch, not just the material you picked in the slicer. If you change spools during the run, mark that point in the record and apply the recheck you defined. The same rule applies when a multi-material assignment changes.
Write product-specific checks before the first print
“Looks good” can’t tell a second person what passed. Define requirements someone can observe, based on the product spec, the approved proof, a drawing, controlled photos, a fit requirement, or other accepted evidence.
For a decorative nameplate, your checks might cover the correct wording and orientation, the specified overall dimensions, how the visible face looks, complete removal of required supports, and the agreed mounting interface. For a decorative desk organizer with a mating lid, you might check the identified mating part, how the lid works, the intended openings, and the surface condition. These are example categories, not universal requirements or tolerances.
Keep visual, tactile, and dimensional evidence separate
A visual comparison can show that color, gloss, layer pattern, seam location, cleanup, or another visible feature matches the accepted sample under defined viewing conditions. Touch can help you find an unexpected rough or sharp spot. Neither one confirms a specified dimension. Where dimensions matter, use the product’s actual limits and suitable measuring equipment. Where fit matters, name the controlled mating part, gauge, or method, and spell out what each result means.
This worksheet doesn’t set a universal tolerance, strength threshold, sample count, layer height, infill value, wall count, or profile setting. Those choices depend on the product, the process, the intended use, the requirements that apply, and the risk. If you can’t define an acceptance standard for a required feature, hold the release and settle the standard first. Don’t let the sample quietly become the standard by accident.
Approve and label the release sample
Print the first candidate with the identified process, but only after you’ve finished the setup and pre-run checks that the manufacturer instructions and your shop procedure call for. Inspect it against every release requirement. Write down actual measurements where the spec calls for them, and specific observations where you’re judging appearance or function.
If it passes, give that physical piece a sample ID. Label the piece or its protective container with the product or SKU, the product and process revisions, the sample ID, the batch or run ID, the material identity, the acceptance date, and who approved it. Note its protected storage location in the batch record. If a label on the piece would damage or hide a feature you compare against, use a labeled bag, box, or tray plus a controlled photo that keeps the connection.
Protect the accepted sample from heat, light, contamination, wear, and casual handling, as the material and product require. Note when someone should review or replace it. A warped, faded, dirty, or handling-polished sample makes poor comparison evidence.
Never let a rejected candidate quietly become the reference just because it’s the only one on the bench. Mark it and set it apart. Keep the failed observation in the run record, then print and inspect another candidate only once the disposition and any authorized change are clear.
A release sample doesn’t approve every later unit
The release decision has a scope: this identified batch, made with this identified process. It says the release piece met the stated checks. It doesn’t certify every part the printer makes afterward.
Set in-process and final checks that fit the product and its risk. An operator might compare selected visible features to the accepted sample at set points, verify specified dimensions with the approved method, and run the final identity and condition check on every unit where the product plan calls for it. Your inspection plan, not this article, decides which checks apply to every piece, which use a justified sampling plan, who’s qualified to perform them, and what triggers a hold.
Make your recheck triggers explicit. A pause, error, power loss, odd sound, loss of bed adhesion, visible shift, material change, tool change, maintenance, adjustment, or unexpected output can mark the point where later pieces need identifying and reviewing. Note the last piece you know you accepted and the first piece that might be affected. Don’t average an obvious variant into a passing batch.
At final inspection, check the finished state the customer will actually receive. If supports, sanding, coating, bonding, heat treatment, hardware, or another post-process belongs to the product, your release sample and acceptance plan need to reflect that route. A print that passed before cleanup can still get damaged, mixed up, or changed afterward.
Put every piece in one clear status
Use physical separation and a matching record. Accepted pieces go only to the accepted spot. Held pieces stay off the packing bench while someone resolves a named question. Rework pieces get an authorized action and come back through the specified reinspection. Mark rejected pieces and control them so they can’t drift back into sale stock.
Don’t let “hold” turn into a vague pile. The label should name the batch, the affected piece IDs or quantity, the reason, the owner, and the next step. And don’t use “rework” to disguise a changed product. If sanding, filling, reheating, bonding, coating, or anything else falls outside the approved route, or could change fit, appearance, performance, or claims, hold the piece for competent review instead of improvising a rescue.
Reconcile quantities at a set point in the run. Give each piece you produced exactly one current disposition: accepted, held, awaiting or in rework, rejected, or used in a documented trial or destructive test. Once a reworked piece moves to accepted or rejected, don’t count it a second time, but keep its rework history separately. Record scrap once, under the disposition your shop procedure defines. The disposition totals have to equal the quantity you produced.
Copy this 3D print batch release worksheet
This is a record structure, not a universal inspection or sampling plan. Fill every blank with requirements and methods approved for the actual product, printer, material, and intended use. Write “not applicable” with a reason where that fits, so a blank never has to mean both “not checked” and “not needed.”
Part 1: Product, files, process, and material
| Record section | Copyable fields |
|---|---|
| Product and batch | Product/SKU: ___; order/proof ID if applicable: ___; product specification/revision: ___; batch/run ID: ___; planned quantity: ___; date/operator: ___ |
| Approved digital identity | Editable model + revision/location: ___; export + revision/location: ___; slicer + version: ___; slicer project + revision/location: ___; archived-project retrieval and reopen check/result: ___ |
| Approved process identity | Printer ID/model: ___; nozzle/tool ID and relevant condition check: ___; printer profile: ___; material profile: ___; process/profile revision: ___; orientation/plate/support reference: ___; controlled manufacturer/shop procedure references: ___ |
| Actual material and post-process | Manufacturer/product/color/specification: ___; supplier/receipt/lot or internal receipt ID: ___; spool/container ID: ___; post-processing route/revision: ___; hardware/other component IDs where required: ___ |
| Release requirements | Feature: ___; source requirement/limit: ___; visual, tactile, dimensional, fit, identity, or other approved method/equipment: ___; result with units/observation: ___; requirement met/not met: ___; hold or disposition reference if not met: ___ (repeat per feature) |
Part 2: Sample, checks, changes, and release
| Record section | Copyable fields |
|---|---|
| Accepted release sample | Sample ID: ___; product/process revisions: ___; piece/batch link: ___; material identity: ___; acceptance date/approver: ___; label contents verified: ___; protected storage location: ___; defined comparison conditions/features: ___; review/replacement trigger: ___ |
| In-process and final plan | Checks and responsible role: ___; every-piece or justified sampling reference: ___; check points: ___; last known accepted piece: ___; final finished-product check: ___ |
| Change and recheck events | Time/piece range: ___; printer/configuration, material product/formulation/color/lot or receipt group, nozzle/tool, software/slicer, model/export, project/profile, orientation/plate/support/material assignment, post-process/hardware, acceptance requirement/method/equipment, interruption, maintenance, adjustment, error, or unexpected output: ___; hold scope: ___; required review/recheck: ___; authorization/result: ___ |
| Segregation and disposition | Reconciliation point: ___; accepted IDs/quantity/location: ___; held IDs/quantity/reason/owner: ___; awaiting/under-rework IDs/quantity/authorized action: ___; rejected IDs/quantity/controlled disposition: ___; trial/destructive-test IDs/quantity: ___; rework and reinspection history: ___ |
| Batch release | Quantity reconciliation: ___; open issues: ___; released/partially released/held/rejected: ___; exact scope: ___; authorized name/date: ___; record and evidence location: ___ |
The final signature should release only the pieces and scope the record actually supports. A partial release has to name exactly which pieces you accepted, and keep the rest held, both on the shelf and in the record.
Changes that send the batch back to hold
Set the rule before the run. At minimum, review any change to the printer, the filament product or lot or receipt group, the nozzle or other active tool, the software or slicer version, the model or export, the project or profile, orientation, support strategy, post-processing, hardware, or the acceptance standard. A change doesn’t automatically mean the product fails. It means the existing release no longer silently answers the question.
The responsible person decides whether documented equivalence already covers the change, a limited recheck makes sense, a new release sample is needed, or broader validation is called for. Keep the affected batch on hold until you’ve recorded that decision and its evidence. Don’t carry a profile, temperature, tool procedure, or acceptance result across printers or materials without the relevant manufacturer guidance and a product-specific review.
Apply the same discipline when nobody changed anything on purpose but the output changes anyway. New stringing, gaps, warping, layer shifts, gloss differences, dimensional drift, unusual seams, poor support removal, or a different fit are observations to contain. On their own, they aren’t diagnoses. Hold the affected pieces, keep the evidence, and work through the manufacturer’s troubleshooting and your shop procedure before you resume.
Release to packaging without losing the identity check
Once you release the batch, move only accepted pieces to packing. The custom-product packaging workflow covers what happens next: cleanliness, protection, order identity, inserts, and labels. Packaging doesn’t turn a held print into an accepted one, and a clean box says nothing about how the product performs.
Keep the batch record, inspection evidence, change events, and retained sample where you can find them, for as long as your shop’s retention policy says. If a customer reports a problem, the record should let you identify what you made and released, without claiming more traceability than you really have.
A release sample earns its place when it stops “this one looks fine” from turning into approval for a whole run. Tie the sample to the approved production identity, keep the later checks running, and give every piece a recorded disposition before it reaches packing.
FAQ
Is one good 3D print enough to approve a batch?
No. One accepted piece gives you evidence about that piece under the recorded process. Batch release also needs a defined scope, suitable in-process and final checks, change triggers, quantity reconciliation, and clear control of later pieces. The product’s risk and requirements decide the inspection and sampling plan, and there’s no universal sample count.
What should a 3D print release-sample label say?
Tie the sample ID to the product or SKU, the product and process revision, the batch or run, the material identity, the acceptance date, the approver, and the protected storage location. Keep the full measurements and observations in the batch record instead of crowding the label.
Can I use the sample to prove dimensions or strength?
No. Looking at or handling a sample doesn’t confirm a specified dimension or a performance property. Measure required dimensions with the product’s approved method, and send strength, durability, safety, or compliance claims to a separate, competent evaluation.
When should an accepted 3D print batch go back on hold?
Follow your shop’s defined triggers. Any change to the printer, filament lot or receipt group, nozzle or tool, slicer or software, model or export, project or profile, orientation, post-processing, or acceptance standard needs a review. Abnormal events and unexpected output also call for containment and the right recheck before affected pieces move on.