
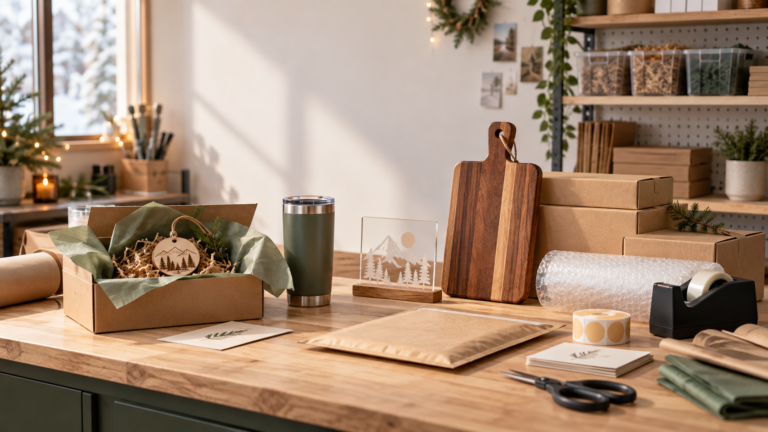
Packaging custom products gets treated like the last step.
That’s the mistake.
For a small maker business, packaging is part of the product experience and part of the profit model. It decides whether the order arrives clean, protected, and giftable. Or whether the customer opens a dusty, scratched, bent, loose, or underwhelming package and starts questioning the whole purchase.
That matters even more during Q4.
Holiday buyers are often sending gifts, ordering close to deadlines, and expecting the product to arrive ready to hand to someone else. A custom item can be made beautifully and still disappoint if the packaging feels careless, confusing, or risky. Worse, weak packaging can turn into remakes, refunds, replacement shipments, bad reviews, and margin loss.
The goal isn’t fancy packaging. The goal is packaging that protects the item, presents it cleanly, repeats under volume, and is priced into the order.
If you’re still planning what to stock before the holiday rush, include packaging supplies in your Q4 inventory planning. Boxes, mailers, labels, inserts, tissue, and protective materials can become just as limiting as blanks or raw materials.
Start with the product’s real risks
Don’t choose packaging because it looks nice on a table.
Start with what can go wrong.
Every product has a different risk profile. A laser engraved ornament doesn’t need the same packaging as a tumbler, acrylic sign, cutting board, ceramic piece, apparel item, or layered wood decor. The right packaging depends on what can break, scratch, shift, stain, absorb moisture, collect dust, or look messy by the time the buyer opens it.
Common risk categories include:
- fragile items such as glass, ornaments, ceramics, acrylic, and layered wood
- scratch-prone items such as glossy acrylic, coated metal, slate, and finished wood
- dust-sensitive items such as dark engravings, cutting boards, tumblers, and apparel
- moisture-sensitive items such as wood, paper goods, unfinished materials, and decals
- shape-risk items with sharp corners, handles, protruding hardware, or delicate attachments
- heavy items that can crush weaker boxes or shift during transit
- personalized items where one scratch, spelling issue, or wrong insert ruins the order
A package has to solve the product’s actual failure points.
If the item can scratch, separate surfaces. If it can shift, control movement. If it can crack, cushion and support it. If it can pick up dust, wrap it cleanly before it touches filler. If it needs care instructions, include them before the customer has to guess.
Packaging isn’t one decision. It’s a set of protections around a specific product.
Build a basic packaging stack
Good packaging usually has layers. Each layer should have a job.
A simple packaging stack might include:
| Layer | Job | Examples |
|---|---|---|
| Product protection | Protect the item surface | tissue, glassine, foam sheet, sleeve, poly bag, wrap |
| Movement control | Stop shifting inside the package | kraft paper, crinkle paper, inserts, void fill, dividers |
| Outer protection | Protect during handling or shipping | box, rigid mailer, padded mailer, tube, corrugated wrap |
| Presentation | Make the order feel clean and intentional | tissue, sticker, ribbon, thank-you card, belly band |
| Instruction/label layer | Prevent confusion and misuse | care card, packing slip, gift note, order label, shipping label |
Don’t add layers just because other shops use them. A layer should protect, present, identify, or instruct. If it does none of those things, it may be adding cost and packing time without enough value.
The stack also needs to match the sales channel.
A local pickup order may not need the same outer protection as a shipped order, but it still needs clean handling and clear identification. A market-table purchase may need a bag and care card. A shipped fragile item may need a real box, internal support, and movement control. A gift-ready product may need presentation that’s included in the price.
One packaging setup won’t fit every product, but every packaging setup should be intentional.
Package for clean arrival, not just safe arrival
Safe arrival is the baseline. Clean arrival is what makes the order feel professional.
A product can survive shipping and still arrive with dust, fingerprints, loose fibers, adhesive residue, scorch smell, filler stuck to the surface, or packaging marks. That’s especially common with laser engraved and handmade products because production can leave dust, smoke residue, char, lint, or tiny edge debris.
Add a cleaning checkpoint before packing.
For custom products, that may mean:
- wiping finished surfaces before wrapping
- brushing dust out of engraved details
- checking dark engravings for lint or fingerprints
- letting finishes cure before tissue or filler touches the item
- separating smoky or charred laser-cut pieces from fabric or paper
- using gloves for glossy, dark, or fingerprint-prone products
- removing sanding dust before packaging wood items
- keeping adhesives away from finished surfaces
- protecting personalization from rubbing during transit
This isn’t about perfectionism. It’s about preventing avoidable disappointment.
A customer may not know what went wrong technically. They just know the product looked better in the listing photo than it did in the box. If your listing photos create a polished expectation, the package needs to support that expectation. For the listing side, see the product photography setup guide, but don’t let good photos outrun the packaging experience.
The product should look ready when the customer opens it, not like it needs to be cleaned before gifting.
Make custom products giftable without overspending
Giftable packaging doesn’t have to mean luxury packaging.
It means the buyer can hand the item to someone without apologizing for the way it arrived.
For many small shops, giftable can be simple:
- clean tissue paper
- a kraft gift box
- a belly band
- a thank-you card
- a product care card
- a small sticker
- a simple ribbon or twine wrap
- a pouch for jewelry, tags, ornaments, or small engraved pieces
- a clear gift-note option
The mistake is assuming giftable always means expensive. Premium boxes, custom inserts, heavy ribbon, branded tissue, and upgraded mailers can look good, but they must earn their place. If a $3 packaging upgrade helps justify a higher price or prevents damage on a high-margin product, it may be worth it. If it quietly eats the margin on a low-priced item, it’s decoration pretending to be strategy.
Think in tiers:
- basic clean packaging included with every order
- gift-ready packaging included on premium products
- upgraded gift packaging as an optional paid add-on
- protective shipping packaging used when the item requires it
That keeps the offer clear. The customer knows what they’re getting, and you know what the packaging costs before the order comes in.
For holiday work, avoid packaging promises you can’t repeat. If the sample photo shows a box, ribbon, tag, filler, care card, and branded sticker, those items need to be available and included. Don’t photograph a version that’s too slow or expensive to pack during real Q4 volume.
Price packaging into the product
Packaging isn’t free just because it isn’t the product.
Every box, mailer, label, card, sticker, bag, sheet of tissue, strip of tape, and minute of packing time belongs somewhere in the price. If you ignore packaging cost, the margin disappears quietly.
Your packaging cost can include:
- boxes or mailers
- protective wrap, foam, sleeves, or bags
- void fill
- tissue, cards, stickers, ribbon, or pouches
- shipping labels
- packing slips
- label printer supplies
- tape and dispensers
- care cards or thank-you inserts
- scale, bins, and packing station supplies
- extra labor time
- dimensional weight or shipping upgrades
- damage and remake allowance
If your boxes, mailers, or carrier costs have changed, revisit pricing alongside your material and shipping cost changes. A product that was profitable with one mailer and one label may not stay profitable after packaging, filler, dimensional weight, and replacement risk increase.
Here is the practical margin point: a small packaging upgrade can be cheaper than one remake.
If a fragile custom product would cost $20 in material, labor, and shipping to replace, spending another $0.75 to $1.50 on better protection may improve margin even though the packaging line looks higher. The cheapest package isn’t always the most profitable package.
That doesn’t mean overpack everything. It means choose packaging based on product risk and replacement cost, not only the lowest supply price.
Create a repeatable packing workflow
Packaging should be part of your repeatable custom order workflow, not a last-minute decision after production is finished.
During slow weeks, improvising may feel manageable. During Q4, improvising turns into delays, missing inserts, wrong labels, damaged products, and packing stations covered in half-open supplies.
Build the workflow before volume hits.
A simple packing station can include:
- finished-goods inspection area
- cleaning cloths, brushes, gloves, or dust-removal tools
- standard boxes and mailers
- protective material bins
- tissue, cards, inserts, pouches, and stickers
- tape and dispenser
- shipping scale
- label printer and labels
- packing slips or order checklists
- local pickup shelf or bin
- outgoing shipment staging area
The setup doesn’t need to be fancy. It needs to make the next correct step obvious.
Batching helps too. Group orders by product type, box size, insert type, or pickup/shipping method. Pre-fold boxes. Pre-cut tissue or foam when that makes sense. Print labels in batches only if you have a reliable way to keep each label with the right order. Keep custom verification separate from generic packing steps.
That last point matters. You can batch packaging supplies, but you shouldn’t rush the name, date, address, SKU, or personalization check.
Build a label and accuracy checkpoint
Packaging failures aren’t only physical damage.
Wrong names, wrong inserts, wrong care cards, wrong labels, and mixed-up local pickup orders can create the same customer-service mess as a broken product. For custom work, accuracy is part of the packaging process.
Before sealing the order, check:
- customer name
- order number
- product SKU or product type
- personalization spelling
- quantity
- care card or insert
- gift note if included
- shipping address or pickup label
- fragile or orientation note if needed
Don’t let the shipping label float around the packing table. Keep it paired with the order it belongs to. If you print several labels at once, use a staging system that prevents labels from landing on the wrong box.
For higher-value or fragile orders, it may be worth taking a quick proof photo before sealing. This isn’t marketing photography. It’s documentation: the right product, clean condition, correct personalization, proper packing, and label/order match.
A simple packing SOP also keeps rush orders from becoming a damage, mislabeling, or missing-insert problem. Rush should mean faster movement through a controlled process, not skipping the process.
Local pickup packaging still matters
Local pickup avoids carrier damage. It doesn’t avoid dust, scratches, confusion, weather, awkward handoff, or poor presentation.
If someone is picking up a custom product as a gift, the package still needs to feel intentional. A cutting board handed over loose, an ornament sliding around in a bag, or an acrylic sign with fingerprints on it can weaken the customer experience even if nothing was shipped.
Local pickup packaging can include:
- kraft boxes
- handled bags
- tissue wrap
- dust bags or pouches
- care cards
- order labels
- pickup bins or shelves
- weather protection for curbside pickup
- clear customer-name tags
The goal is simple: the product should stay clean and identifiable from the moment it leaves your workbench to the moment the customer hands it off.
This also protects your operations. During a busy week, labeled pickup bins reduce the chance of handing the wrong order to the wrong person. Clear pickup instructions reduce messages. Basic packaging prevents finished items from rubbing against shelves, bags, or other orders while they wait.
Don’t treat local pickup as an excuse to skip packaging. Treat it as a different packaging path.
Run shipping tests before Q4 pressure
Don’t wait for the carrier to test your packaging for you.
Run simple tests before Q4 volume hits:
- shake the packed box and listen for movement
- drop from counter height onto different sides
- check corners for compression
- leave a sample in a warm or cold car if temperature matters
- mail a test order to yourself or someone nearby
- open it like a customer would
- check for scratches, dust, shifting, odor, moisture, bent corners, or crushed presentation
The point isn’t to simulate every shipping disaster. The point is to find obvious weaknesses before customers find them.
If the item shifts, add movement control. If tissue sticks to the finish, change the wrap or cure time. If the box crushes, upgrade the outer packaging. If the product arrives safe but ugly, fix the presentation. If the packaging costs too much, raise the price, create a gift-packaging upgrade, or simplify the product.
A shipping test is cheaper than learning through replacements.
Create packaging rules by product category
Once packaging works, write it down.
You don’t need a corporate manual. You need a repeatable rule for each product category.
A simple packaging rule can include:
| Product category | Default package | Protection | Insert/card | Label step | Gift option | Cost/time note |
|---|---|---|---|---|---|---|
| Ornaments | Small kraft box | tissue or pouch | care card | customer name + order number | ribbon/tag | check fragile edges |
| Cutting boards | Corrugated box | paper wrap + corner control | care card | order number + material note | belly band | price for box size |
| Acrylic signs | Rigid mailer or box | surface sleeve + foam | install/care card | orientation note | tissue wrap | protect from scratches |
| Tumblers | Tumbler box | sleeve + void fill | care card | address/name check | gift box upgrade | confirm lid/straw included |
| Apparel | Poly mailer or box | folded bag/sleeve | care card | size/color check | tissue/sticker | keep smoke/dust away |
These rules make packaging trainable. If you bring in help, batch orders, or handle a rush week, the process doesn’t live only in your head.
They also make pricing easier. When you know the default package, protection layer, insert, labor time, and remake risk by category, you can stop pretending packaging is a vague afterthought.
What not to do with packaging
A few packaging habits create more problems than they solve.
Don’t rely on fragile labels as protection. They can be useful, but they don’t replace internal support, correct box size, or movement control.
Don’t overpack low-risk products just because the unboxing looks better. Extra material can add cost, slow packing, increase shipping weight, and create waste without improving the customer experience.
Don’t underpack high-risk products because the box looks clean. Presentation means nothing if the item arrives cracked, scratched, or bent.
Don’t use packaging that only works for the sample photo. If the real order will arrive differently, either change the photo or change the packaging.
Don’t add premium packaging without pricing it. Gift-ready presentation can be valuable, but only if the margin survives.
Don’t let packaging supplies scatter across the shop. The more volume rises, the more a messy packing area turns into wrong labels, missed inserts, and avoidable delays.
Packaging should make the order more reliable, not more fragile operationally.
Final packaging checklist before Q4
Before holiday orders pile up, check the basics:
- Each product category has a default package.
- Fragile and scratch-prone products have real protection.
- Finished items get cleaned before wrapping.
- Packaging matches what the listing photo promises.
- Giftable packaging is either included in the price or sold as an upgrade.
- Box, mailer, label, insert, and labor costs are included in pricing.
- Shipping tests have been run on risky products.
- Local pickup orders have their own packaging path.
- Packing supplies are stocked before Q4 volume.
- Labels stay paired with the correct order.
- Care cards and thank-you inserts are staged.
- Rush orders still move through a controlled packing process.
- Helpers can follow the packaging rules without guessing.
Packaging isn’t the glamorous part of a custom product business. It’s one of the parts customers remember when it goes wrong.
A clean, protected, giftable order tells the buyer the shop is careful. A damaged, dusty, or confusing package tells them the opposite, even if the product itself was made well.
Build the packaging system before the rush. Keep it simple. Price it honestly. Test it before customers do. That’s how custom products arrive clean, giftable, and profitable.
FAQ
What is the best packaging for custom products?
The best packaging depends on the product’s risk. Fragile products need cushioning and movement control. Scratch-prone products need surface protection. Gift items need clean presentation. The right package protects the product, looks intentional, and can be repeated without slowing the shop down.
How do I package laser engraved products for shipping?
Clean the product first, protect engraved or finished surfaces, prevent movement inside the package, and choose an outer box or mailer that matches the item’s weight and fragility. For smoky or charred laser-cut items, keep residue away from tissue, fabric, paper inserts, or other products.
Should handmade products include gift packaging?
Gift packaging can help, especially during Q4, but it should be priced correctly. Some products only need clean basic packaging. Premium gift boxes, ribbon, branded inserts, or upgraded presentation can be included on higher-priced items or offered as a paid upgrade.
How much should I charge for packaging custom products?
Include the full packaging cost in your pricing: boxes, mailers, protective materials, labels, inserts, tape, labor time, shipping weight, and damage/remake risk. If upgraded gift packaging adds real cost or time, price it separately or build it into the product price.
How can I reduce damage when shipping fragile handmade items?
Start by identifying what can break, scratch, shift, or crush. Use surface protection, internal cushioning, movement control, and an outer package strong enough for the item. Run simple shipping tests before Q4 volume so you can fix weak spots before customers receive damaged orders.